








Draw buildings

You draw buildings in the scene with three tools: “Building” from an area, “Building line” along a line, and “Plot row” for a row of houses with plots. You then choose the function, floors, roof and facade in the panel on the left.
Draw a building
-
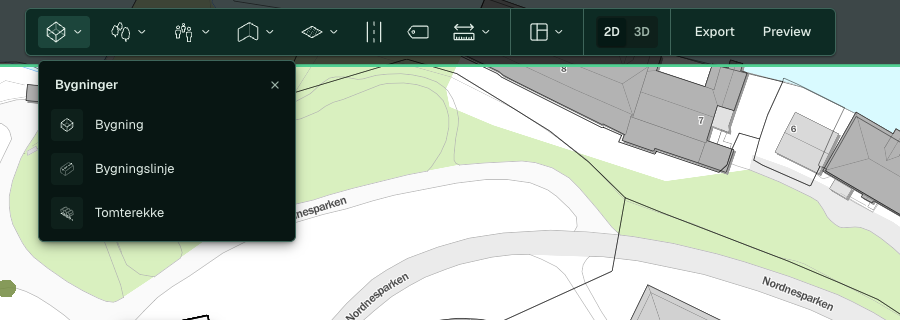
Click Buildings in the toolbar and select Building.
-
Click the corners on the map. Press Enter to complete, or double-click the last corner. Esc discards the draft. The building is selected as soon as you complete the drawing.
-
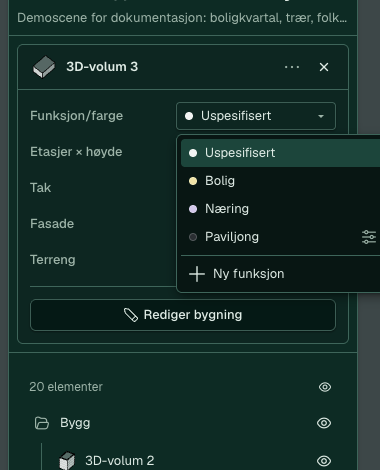
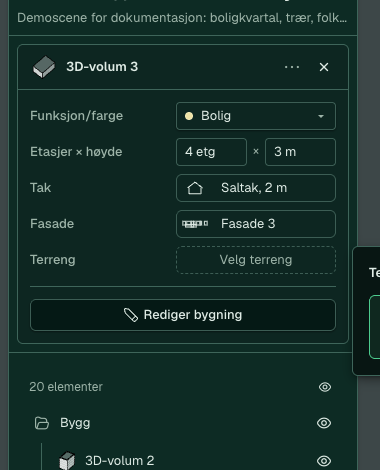
Choose a function in Function/colour: “Unspecified”, “Housing”, “Business” or “Pavilion”. Type 4 in the first field of “Floors × height” and 3 in the second.
-
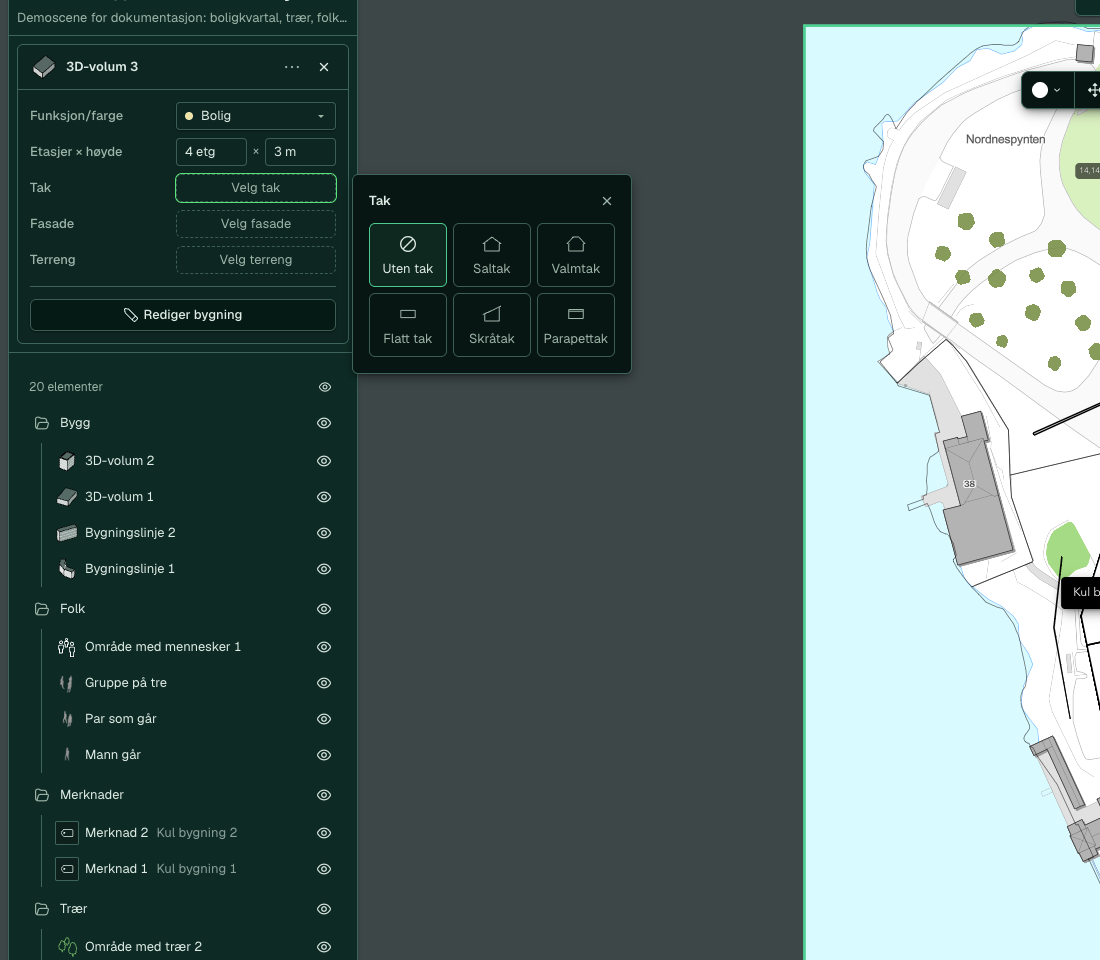
Click Select roof and select Gable roof. You can also choose “No roof”, “Hip roof”, “Flat roof”, “Shed roof” or “Parapet roof”.
-
Click Select facade and select tile 3.
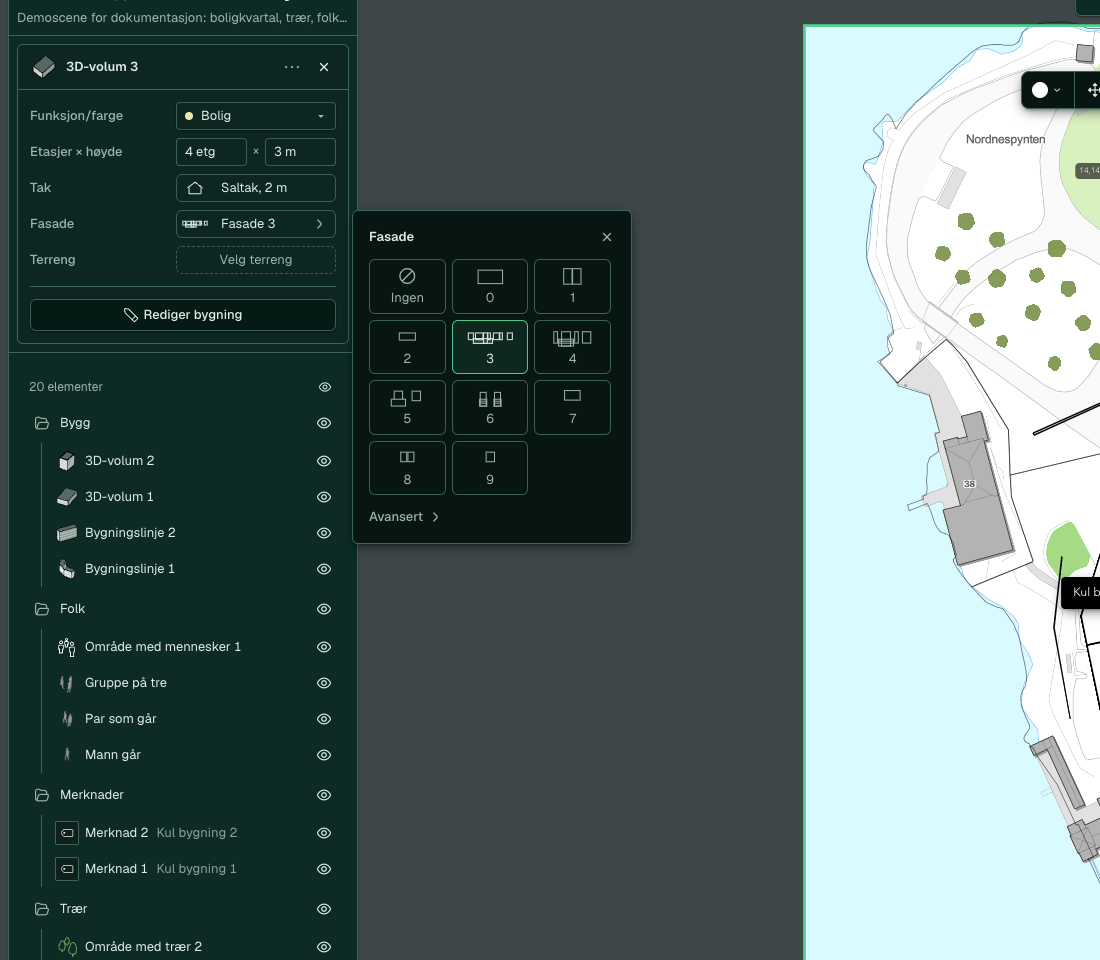
When you have chosen the function, floors, roof and facade, the panel looks like this:
-
Click 3D to see the building.


Without a roof and facade, the building is a yellow block. With a gable roof and facade 3, it gets a roof, windows and balconies.

Drag a corner to change the shape, or drag the midpoint of a side to add a corner.
Draw a building line
Building line suits a long, narrow building.
- Click Buildings and select Building line.
- Click the points along the line and press Enter.
- Type 5 in the first field of “Floors × height”, 3.2 in the second and 12 in Width. The field also accepts a comma and shows the value as “3.2 m”.
- Tick Sections if you want to divide the line into sections. The section length is 16 m by default. You can change a single section in Edit a building in detail.
- Click Select roof and select Flat roof.
- Click Select facade and select tile 3.


Draw a plot row
Plot row places one building on each plot along a line.
-
Click Buildings and select Plot row.
-
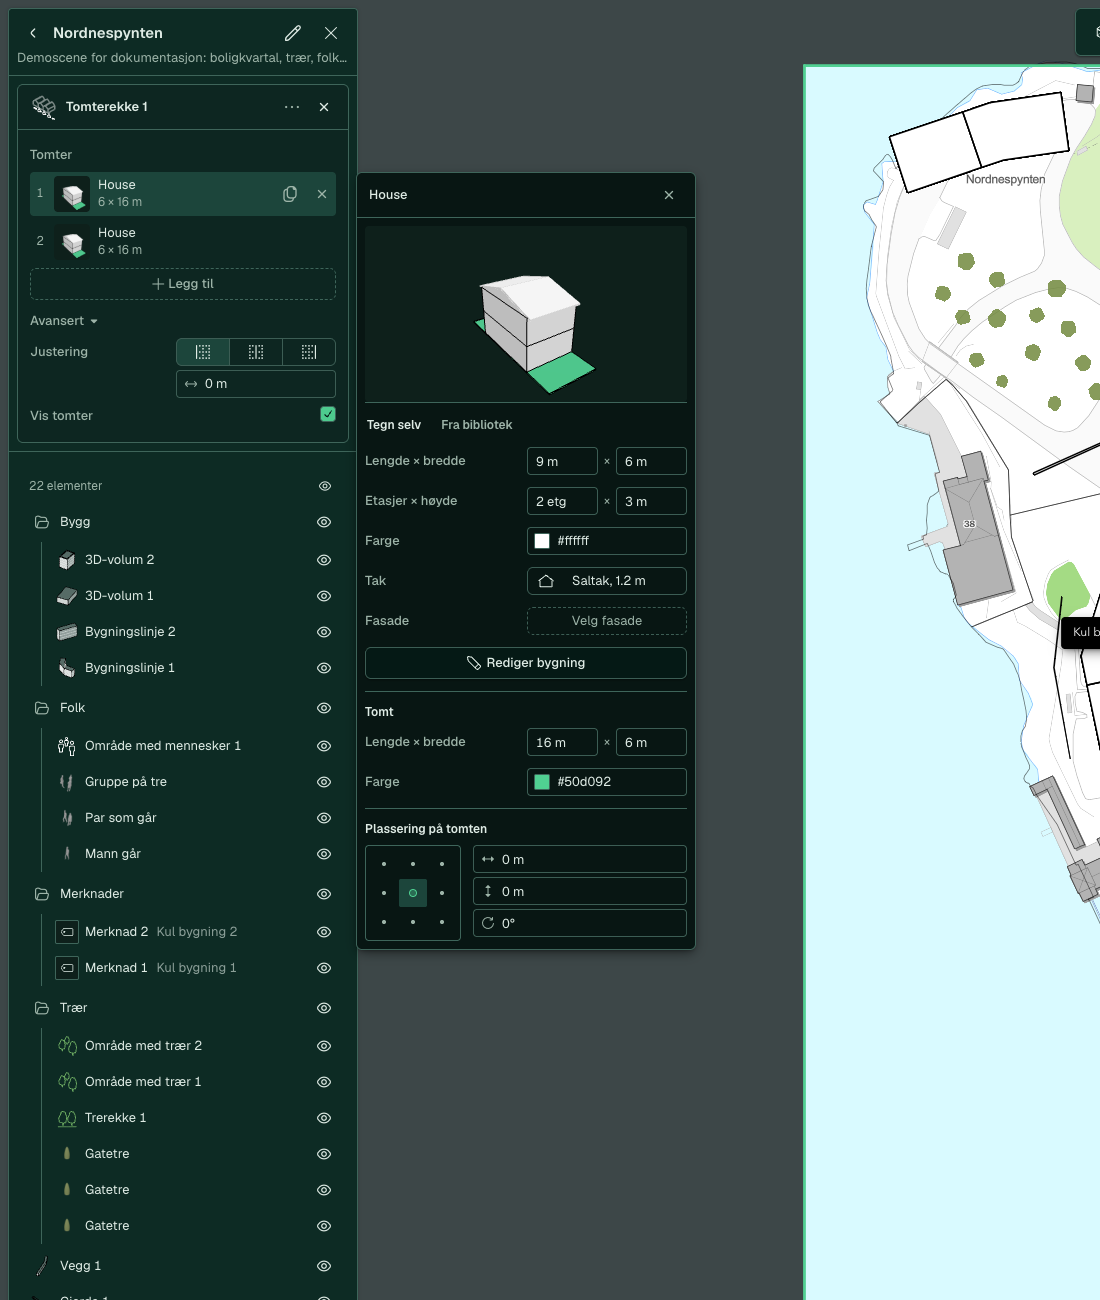
Click two or more points along the street and press Enter. The row is named “Plot row 1”. The template under “Plots” shows the plot as “6 × 16 m”, and “Length × width” for the plot in the template shows 16 × 6 m.
-
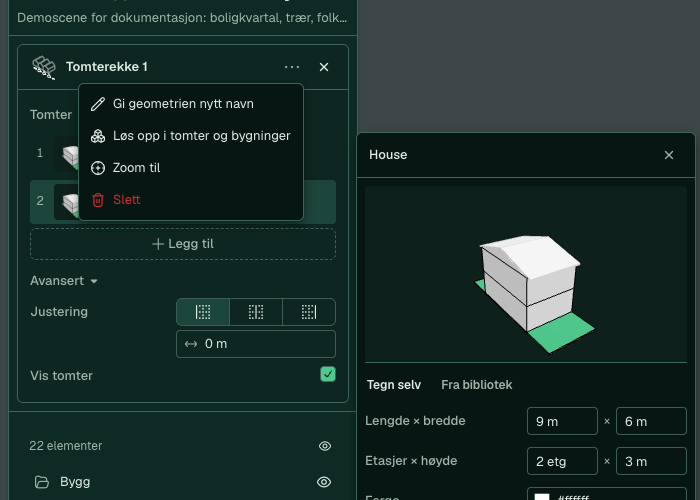
Click Edit House under “Plots” to change the house template, including “Length × width”, “Floors × height” and “Roof”. Close the window with x when you are done.
-
Click Add if you want the row to have another house template. The templates alternate along the line.


Advanced
-
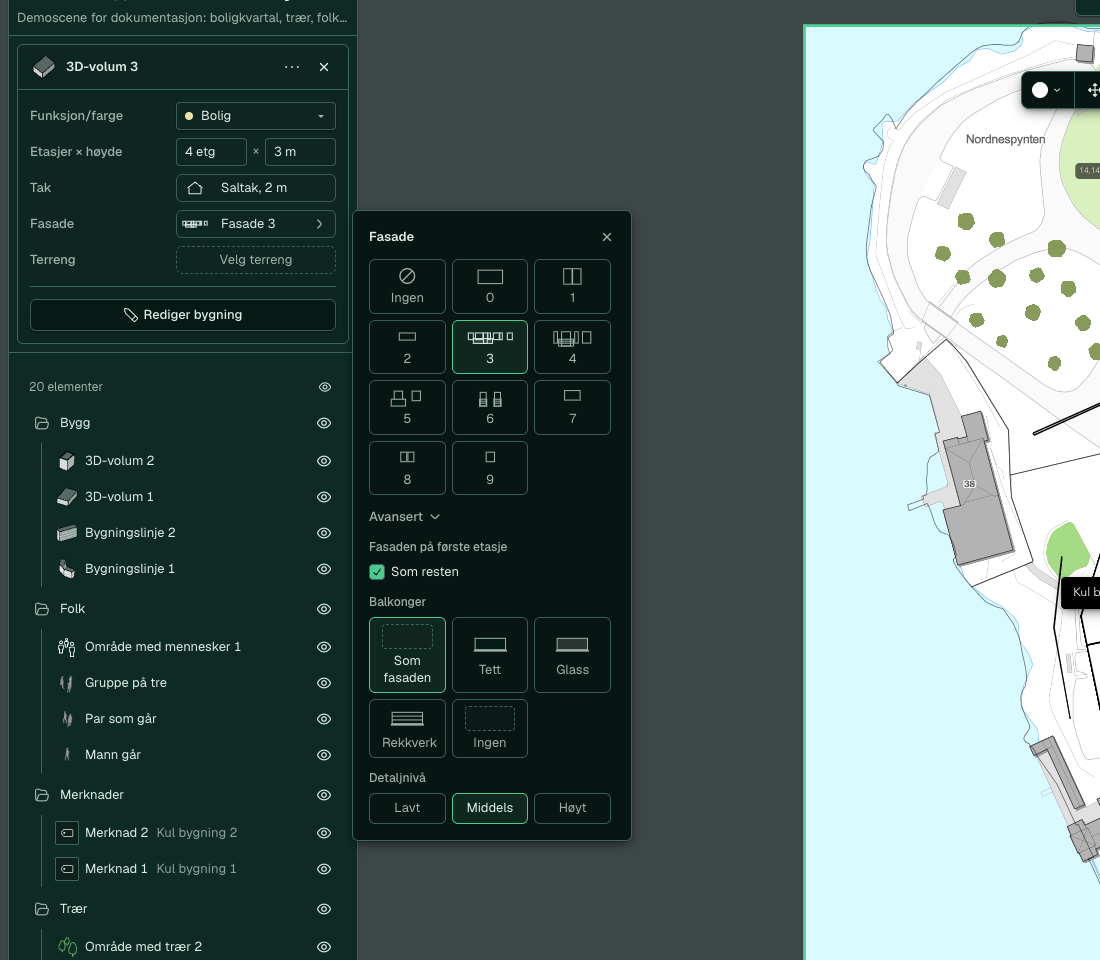
Under Advanced in the facade options, you choose the facade on the ground floor, the balconies (“Same as facade”, “Solid”, “Glass”, “Railing” or “None”) and the level of detail (“Low”, “Medium” or “High”). The values are listed in Facade.
-
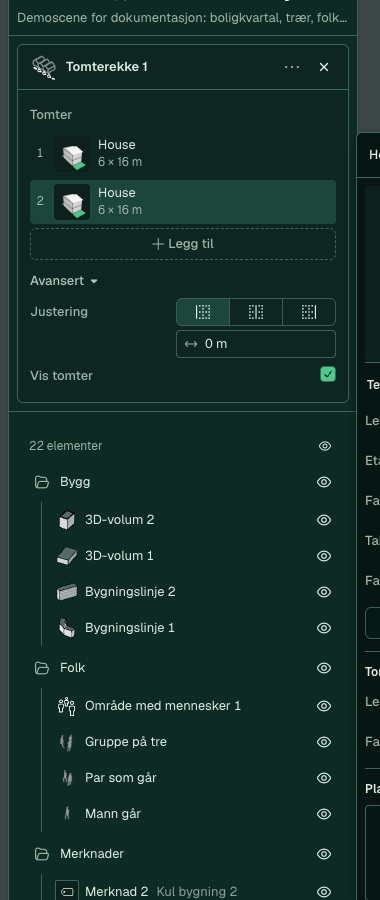
Under Advanced in the plot row, you set “Alignment” to left, centre or right, enter the distance from the line in a field, and choose whether the plots are shown.
-
The menu in the panel header has “Rename geometry”, “Dissolve into plots and buildings”, “Zoom to” and “Delete”. “Dissolve” splits the row into separate plots and buildings, and you cannot undo it.


See also
- All tools and settings for values and limits
- Edit a building in detail for individual floors and sections
- Terrain to shape the ground under the building